This is a new type of blog post that I am working on, a variation on the #FLIPCLASS DIARY theme where I am attempting to give some technology integration lessons in a simple format, focusing on the overview, applications used, and impact on the lesson.
In all honesty, i am also trying to avoid doing taxes so I am guaranteed to accomplish that goal at least. As always, love the feedback (here or on social networks) and the Retweets. I am beginning to gauge which blogs are working (Flipclass and BYOT commentary) and which ones don't (3 rants in a week cannibalize on themselves).
Creating a Multimedia Presentation - Part I
Objective: Students will create a multimedia presentation that includes narration, text, photographs with the option of adding video and secondary audio.
Primary Tools:
Multimedia creation: iMovie, Windows Movie Maker, PowerPoint, weVideo
Secondary Tools:
Storage and Sharing: Box, Dropbox, Google Docs
Audio Capture: Soundcloud, Audacity, PowerPoint
Picture Editing: Picsay Pro, Skitch, Google Docs Drawing, PowerPoint
Classroom Applications and tools:
Todaysmeet.com - Backchannel
Google forms - Group assignment and prelection
Post-it paper and markers
Prelection and Context Setting: Preview and Day 1
[Note: my favorite part of this lesson]
Overview: many of our students come into highschool with a pretty decent formal or informal ability to create multimedia production in either PowerPoint or one of the basic movie software programs. What seems to be missing is the ability to think about the projects in terms of quality, achievement of message, or goals beyond completion.
Students were assigned to read the Isaac Asimov Essay,
"The Relativity of Wrong". Its a great essay for high school students and has some nice things to say about the state of assessment in education. (the copyright of this is still bothering me, but it is out there so...)
 |
Today's meet provides instant backchanneling
for live discussion |
We created a backchannel using
Today's Meet. I love backchannels so much more than clickers. Backchannels empower students to give more than a fill in the blank response and give them the opportunity to engage withe each other as well.
a few pointed reading check questions were asked to start things off:
- What is the overall point of the essay? What does the author want you to come away with?
- What is one description, example, or point that is made that struck you as insightful or interesting?
This puts students into the mode of responding and gets the neurons firing. It also served as a setup for the next section.
Students then watched a YouTube video of
"Relativity of Wrong" created by a fan of the essay. I was very explicit to explain to the students that i thought there were some things executed very well and some things that need a lot of work.
As they watched the video, they were to fill in the back channel with observations about the presentation. They were to focus on what was executed well and what needed work to improve it. Through the course of the backchannel (11 pages long when printed) the students pointed out on their own, elements that would have made any English teacher...well, any teacher...proud:
- Too much text and the screen
- Monotone voice
- Could use some animation
- Good use of photos to underscore ideas
After the backchannel, we reflected on the ideas presented. Students developed their own set of working guidelines for making a presentation (Dos and Don'ts). From a social media/digital citizenship side, the students were able to criticize without personalizing and even complimented others on good points.
Homework: Find an essay, piece of writing, portion of book, etc that you will use to make a five minute multimedia presentation from.
Preparation and Storyboarding: Day 2-3
The next day, students created small group and discussed each individual idea for its pros and cons. Many of the elements identified the day before came up in the discussions (practical reinforcement) and students began to discuss their plans. By the end of the day, each group had filled out a GoogleFORM (survey) that identified groups, topics, initial themes and focus points.
 |
One of the more popular tools we demo is a
mobile App for ANDROID called Picsay Pro |
#FLIP video: Preparation That night, students watched a flip video that gave them an overview of non-linear video creation (this is the most common type of video/multimedia, used in iMovie and Windows Movie Maker among others). The video also previewed the use of a number of tools that would be good options for adding captions to photos, simple animations, and sharing the files that students would be collecting for their projects ("the bin").*
*NOTE: this is key to a #BYOT environment. It is not about teaching the specific buttons to push. it is giving the overview that allows student the time and the space to experiment with tools.
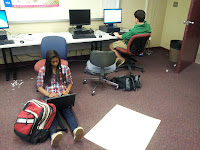
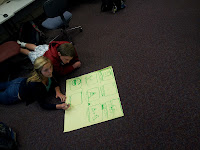
In-class: Storyboarding After a brief demonstration that walked students through the basics of storyboarding, they were off to work on their own. I was able to meet with each group at least three times over the course of the next day and a half of class. During these discussions we talked about advantages and disadvantages of specific tools, questioned the level of specificity on some of the boards (and how the lack of detail might cause more work later on).

Again, the focus was not on the specific tools that were being used. Most groups had the basics down. And for students who were struggling with a specific technique, it was much simpler and more effective to show that one students (and any others interested in learning a specific process).
By the end of Day 3: most groups had completed their preliminary Bins of material to include. A number of students had begun working on captions and title slides. One group had decided, based on the types of transitions and animations that they were planning, that they would be better off using PowerPoint, with its numerous transition and motion effects rather than iMovie which was more limited when dealing with 5 simultaneous effects on 5 different photos.

Over the weekend, no homework was assigned, but a number of groups had created a GoogleDoc that was shared in order to write voice-over scripts and hash out any details they needed before production began in earnest.
Reflection:
So far, I have been very pleased with this assignment. It has allowed the students to focus on the objectives of the project (creating an effective multimedia presentation) by empowering them to use the tools with which they are most comfortable.
Beyond this, they have found a benefit in planning, preparing ahead of time, and working collaboratively in real-time and asynchronously.
This week, students will close the loop by reviewing each group's creation for message communication, technique, and overall message -- the same as was done during the prelection exercise.
Please feel free to Like, Comment, Repost, Retweet, +, etc. As always, we are interested in feedback and commentary. I would love to know if this type of post is useful to my tens of followers -- and if you are interested in a part II. :)


